They say you should do one thing every day that scares you. Well I’m scared of this thing:
Professional stock photographers will tell you not to use flash.
What they mean is: Don’t use the flash that pops up on your camera.
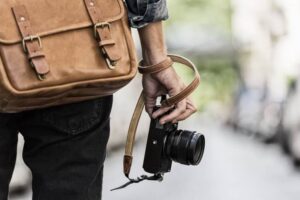
If you have an off-camera flash like the one pictured above, you can bounce the light off of walls and ceilings… you can use it indoors, outdoors, on your camera or off to the side…
And this week at the Ultimate Money-Making Photo Workshop, we have a new guest speaker, professional photographer Mike Hagen, here to show us how. I asked Mike to give it to me straight: How hard is it, truly, to learn how to use off-camera flash?
Find out in his interview, below…
What’s So Great About Off-Camera Flash?
Interview with professional photographer Mike Hagen
Bonnie: Mike, why should we bother with off-camera flash if we can shoot in daylight?
Mike: The best thing about using an off-camera flash is you have full control over the outcome. Many photographers who haven’t used off-camera flash are intimidated by the process because it seems like some kind of black magic to control the output.
However, if you follow a couple of super-simple rules, off-camera flash becomes easy. Natural lighting is good, but it’s much more difficult to control since you are literally at the whim of the weather or external conditions. I love natural light and often incorporate it into my photography, but small external flashes give me the control I need.
Also, most natural lighting tends to come from overhead, which results in dark shadows under the subject’s eyes. Off-camera flashes allow you to move the light in front of the subject so you can capture nice catch lights in their eyes.
Bonnie: Why can’t we just use the pop-up flash on our cameras to achieve all of that?
Mike: I affectionately refer to on-camera flash as “flashus horribilis” because it produces very unflattering light for your subject. Direct, on-camera flash is what we call “flat light.” Off-camera flash produces directional light and allows us to sculpt the subject with soft shadows, while creating a nice modeling effect. Using off-camera flash is an easy and inexpensive way to take your flash photography to the next level. Removing your flash from your camera and placing that flash into an umbrella or softbox will result in the best looking flash photographs. This simple step alone will take your flash photography from boring to sensational.
Bonnie: What are the very basic essentials that someone needs to get started with off-camera flash?
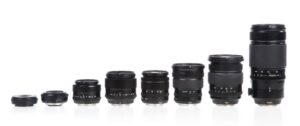
Mike: At the most basic level, you really need 4 things:
- A dedicated flash unit for your camera. For Nikon shooters out there, this would be something like a Nikon SB-700 or SB-910 . For Canon shooters, something like a 320EX or 580EX will work just fine. If you use Nikon gear, then you can trigger your flashes wirelessly directly from the camera body. If you shoot Canon, then you need another “master” flash to trigger the remote flash.
- A light stand. You can buy these from just about any camera store in the world. Get something that extends to at least six feet tall. A high-quality light stand from Manfrotto or Photoflex will cost about $45. More economical stands will only cost $20.
- A simple umbrella. I recommend something around 32 to 45 inches. Generally speaking, bigger is better. Larger umbrellas will give you a softer light overall. You can purchase a nice umbrella for $15 to $25.
- An umbrella bracket. This is to attach the umbrella to the light stand. These should cost about $12 to $20 depending on quality. All of the equipment I list here is brand-name equipment. You can buy third-party gear that also works just fine. For example, you can easily purchase an inexpensive flash for $75 and the subsequent light stand, umbrella and bracket for another $50, total.
Bonnie: Is it hard to learn how to do this? How should I get started?
Mike: The best recommendation I can give is to just do it. I know that sounds like a cop-out, but experience is a great teacher with respect to flash photography. Simply buy the equipment and then set it up in your living room. Start taking pictures to see how the umbrella works and to understand how to adjust flash power. The overall investment in equipment is pretty low, so it doesn’t take a lot of capital to produce great results. Set your camera for ISO 400 and Aperture Priority mode at f5.6. Turn on your flash and set the flash mode to TTL, then begin shooting! The camera’s meter will figure out your flash for you and do all the difficult calculations all by itself.
Bonnie: Thanks, Mike!